3.0 Simplified Scripting: Difference between revisions
From Iron Realms Nexus Client Documentation
| Line 21: | Line 21: | ||
==== Desktop Notification ==== | ==== Desktop Notification ==== | ||
This action provides a desktop notification when a specific trigger has been fired. For instance, you could create a trigger that sends a desktop notification whenever someone enters the room. | This action provides a desktop notification when a specific trigger has been fired. For instance, you could create a trigger that sends a desktop notification whenever someone enters the room. | ||
NOTE: You must have "notifications" turned on in Settings -> Display Options. In addition, you may have to "allow" notifications in your browser. | |||
[[Image:Action-notification-new.png]] | |||
[[Image:Notification.png]] | |||
==== Play a Sound ==== | ==== Play a Sound ==== | ||
Revision as of 17:20, 29 May 2023
Effortless Scripting with Nexus 3.0
Nexus 3.0 Simplified Scripting tool enables users to craft intricate triggers, aliases, events, and keybinds using an easy-to-understand interface. This tool provides a robust alternative to the previously required advanced scripting methods, which demanded proficiency in Javascript.
The tool incorporates 15 distinct actions for various uses. It's worth noting that 'Hide the line', 'Highlight', and 'Rewrite' are exclusive to triggers and events, and cannot be used for aliases or keybinds.
Action Options in Nexus 3.0
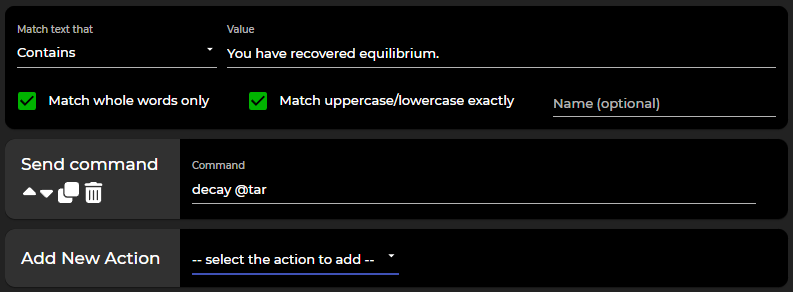
Send a Command
The most fundamental and frequently used action, this allows the trigger to automatically send a text response to the game. For instance, when the action is activated, it could send the command 'attack rat'.

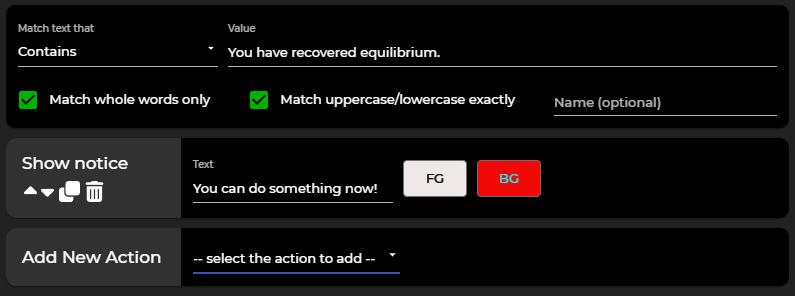
Show a Notice
This action displays a notice in the colors of your choosing. Players often use this feature to highlight an event or occurrence that they need to take note of but not necessarily respond to immediately. An example usage could be to display a bright red 'HIT HIM AGAIN' message when activated.
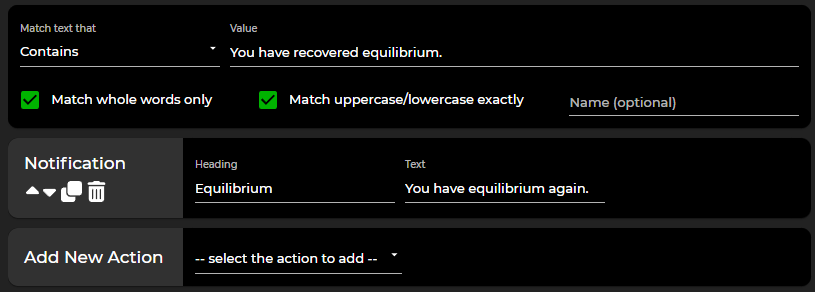
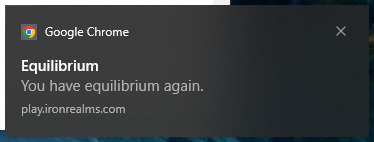
Desktop Notification
This action provides a desktop notification when a specific trigger has been fired. For instance, you could create a trigger that sends a desktop notification whenever someone enters the room. NOTE: You must have "notifications" turned on in Settings -> Display Options. In addition, you may have to "allow" notifications in your browser.
Play a Sound
This action lets you play a specific sound when a trigger is fired. You could set up an alert sound to be played whenever another player enters the room.
Wait
The wait action is generally used alongside other actions. For instance, you could set up an action to 'wait' for 3 seconds and then 'attack the rat'.
Wait for
This action acts as a temporary trigger. It allows you to stipulate a line or pattern to wait for. Once detected, the script continues its execution normally. If not found within the defined timeout, the script is halted. For example, you could set up a trigger to fire when you regain your mental equilibrium and then wait for 10 seconds to receive the text 'You have recovered balance.' before sending the next command, 'kick rabbit'.
Hide the Line (or Gagging)
This option lets you hide any line that matches your trigger, which can be handy for repetitive text you're tired of seeing. This action is also known as 'gagging'.
Highlight
This action enables you to highlight the matched text. There are also additional options to highlight the surrounding text associated with the trigger.
Rewrite
A rewrite will replace the trigger text with whatever you prefer. This can be particularly useful for abbreviating lengthy combat messages. For instance, you could rewrite a lengthy message to simply display 'Balance back' in bright yellow.
Linkify
Similar to rewrite, Linkify changes the trigger text to your preferred phrase. Additionally, it converts the text into a clickable link, which can perform any command of your choice. For example, you could change the trigger text to 'Need to wake up!' and make it a link that will issue the 'wake' command.
Modify Variable
This action is used to modify a specified variable. You can set its value, increase or decrease it, assign the value of another variable to it, or modify it by the value of another variable. You can also assign the matched text or a captured part of it. This is a highly flexible action.
If
This is a powerful action for reflexes, allowing your reflexes to execute actions based on certain conditions. For instance, you can compare two variables, or a variable and a fixed value. You can also compare it against the matched text or a captured part of it. Depending on whether the check succeeds or fails, you can determine whether the reflex continues to run normally, stops, or continues running from a 'Label' action.
Repeat
This action lets you repeat a block of actions multiple times. All actions leading up to a label that you specify will be repeated.
Label
This action doesn't do anything by itself. However, it's used in conjunction with 'If', 'Repeat', and 'Jump to Label' actions to allow for conditional execution and looping.
Jump to Label
This action prompts a jump to a label of your choice. It's best used within an 'If' or 'Repeat' block to avoid creating an endless loop.
Disable this Reflex
This action disables the current reflex, which can be useful when creating reflexes intended for single-use.
Disable Reflex
This action lets you disable a chosen reflex, which must have a name. It can also disable entire groups of reflexes.
Enable Reflex
Similar to 'Disable Reflex', this action enables a named reflex or a group of reflexes.
Stop
This action halts all actions beyond this point. This can be useful for testing or within 'If' actions.
Modify a Button
This action allows you to modify any of the client's buttons. You can change the label, change the command, highlight, unhighlight, or reset the button to its default state.
Important Links
Nexus 3.0 Documentation
The following links describe how to use the Nexus Client.
The Basics
- Nexus Account
- Game Selection
- Character Management
- The Game Client
- Windows and Tabs
- Keys, Gauges, Avatars
- General Functions
Client Settings
- Display Options
- Colors
- Buttons
- Reflex Packages
- Reflexes
- Variables
- Custom Tabs
- Gauges
- Advanced
- Feedback
- Help


